Thursday, December 12, 2013

Toy of Christmas Past - Part 19 - Crossfire / Gunfight at O.K. Corral

Crossfire / Gunfight at O.K. Corral - Ideal - Early 1970's

These two toys were very similar in game play and equipment, and were part of IDEAL toys "golden era" of ball bearing toys. 

The Golden Era of Ball Bearing Toys

I have a theory.  In the early 1970's IDEAL toys must have purchased or inherited a ball bearing factory with a million or so ball bearings.  Not knowing what to do with them, some pitch man came up with the idea, "Let's incorporate them in as many toys as possible !".  "What about SAFETY" someone asked.  "You're fired" proclaimed his or her manager ..... or so my version of history goes.

In that era there were at least 4 toys with major components being ball bearings, They were:

Imagine the lawsuits today, the choking hazards.  What did we know back then.  Our biggest problem was picking up after ourselves and trying to avoid having some of the ball bearings being vacuumed up by the vacuum cleaner.   ..... and now back to our story, already in progress .....

Crossfire

Crossfire was the first of the two toys to come out, probably around 1970 or 1971.  This game was HUGE and it was HEAVY.  The board was about 4 feet long.  The bottom of the playing surface was like the same material as "pegboard" it made of, and that made this game heavy.

This was a "hockey like" game.  You had a puck (also made from a ball bearing) which was placed in the center of the playing surface.  Each of the 2 players had guns attached at the center end of the boards behind the "goals".  The object was to shoot your ball bearings at the puck and try to knock it across the other goal.

While you were shooting your opponent was also shooting.  You could also run out of ammo at a critical time as you had to manually load the chamber of the gun with the ball bearings, though it had a capacity of at least a half a dozen "bullets".  Occasionally, a ball bearing or two would fly off the table onto the floor or carpet, awaiting to get vacuumed up, thus as time went on the amount of ammunition that the game had would start to dwindle.


Here is the game in "action".


Gunfight at O.K. Corral

This was also a ball bearing shooting game.  Instead of shooting at a puck however, you would shoot at your opponent.  Attached to the front of the "gun" was a plastic figurine of a gun fighter from the old west.  The object was to hit your opponents figurine and make him "pop off" the gun, thus "killing" him.


Unlike crossfire, where the guns were fixed in one location and could only rotate, here the guns could also slide the entire length of the side of the board.  Thus you could "hide" behind plastic cactus or rocks.  You would need to "expose" yourself in order to fire a shot at your opponent.


The board was also made totally of plastic (not pegboard) and was a lot small than the Crossfire game.

Here is a short video showing the game


Tuesday, December 10, 2013

The Fine Art of Snow Luminaries

Snow Luminaries: A How-To Guide


The recent snowfall around my area, plus the proximity of Christmas and New Years is the inspiration for this current blog post.  I will try to illustrate in words and pictures the simple steps of making snow luminaries.

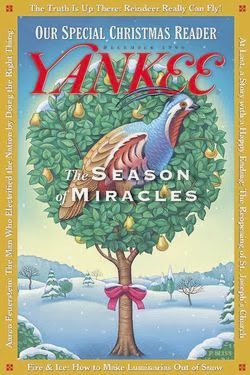
December 1996 Edition of Yankee Magazine


First, give credit where credit is due.  I did not come up with this procedure myself, rather I read an article a number of years ago in the December 1996 issue of Yankee Magazine which described the process.  Over the years, based upon real life experience, I have modified the steps slightly.

This is a family tradition, (snow permitting) that we try to do if the weather cooperates at either Christmas Eve, Christmas Night, New Years Eve, New Years Night.

The items you will need are common house hold items.  These are


  • A plastic or metal bucket
  • A small shovel to shovel snow into the bucket
  • A table spoon
  • (option) A garden trough
  • Candles (1 for each Luminary)
  • Matches or other type of lighter

Step 1: Fill the bucket with Snow


Step 2: Pack the Snow Down Tight

If the snow is powdery, then you might have to add some water to the snow in the bucket to make the snow "wet"


Step 3: Invert the bucket at the desire location of the luminary

You might have to "slam it down" onto the ground and also "tap" the top and sides so that the snow does not stick into the bucket.  This is basically the same idea as a sand and pail at the beach, but you are using snow.


Step 4:  Begin to Hollow out the middle of the luminary.

For this step you will use the table spoon.  go down at least 1/2 to 2/3 of the way down.  Hollow out the side as well so that you have about 1.5" to 2" left on the sides.  You want to be able to easily stick your hand in the hollowed out part, because you will need to stick a candle inside the luminary, and also light the candle.  You also probably want to have a flat surface at the bottom so that the candle can rest relatively level on the bottom of the luminary.

The thinner the walls of the luminary, the more that the luminaries will "glow" when a candle is lit.  It is a fine line between too thick and too thin.  Too thin and your entire luminary may collapse.

The theory goes, the deeper the cavity, the more protected from the wind the candles will be, and thus be less likely to blow out.


Step 5: Repeat as necessary to make as many luminaries as you want

When we make snow luminaries, we usually will line both sides of the driveway and also the walkway leading up to the house.


Step 6:  Insert Candles into each luminary and light

You might want to wait until at least twilight for this step.  We use pillar candles that we can get in bulk from Wal-Mart.  In a pinch we also have used tea-light candles although they will burn out quicker.  To light the candles, we will sometimes light the first candle and then use it, to light all the other candles.  Do what works best for you.

The nice thing about snow luminaries is the relative safety.  If the candle tips over, there is nothing to burn except snow which of course doesn't burn.


Step 7: Enjoy you safe Festive Light Show


Thursday, December 5, 2013

Toys Of Christmas Past - Part 18 - Creepy Crawlers/Thingmaker

Creepy Crawlers - Mattel 1964 - 1973


The next set of toys on our list is the "Thingmaker" playsets from Mattel.  This toy simultaneously gets my vote for both my favorite of all time and most dangerous toy. Now some might say "Bag 'O Glass" from the old Saturday Night Live skit was pretty dangerous, well that has nothing on this toy.


Bag O' Glass from 1970's SNL skit.


Mattel Thingmaker Playsets of the Mid 60's to early 70's were dangerous as well as fun.  The original which started the entire thing, was the Creepy Crawlers set from 1964.


Creepy Crawler Playset 1964

Metal Molds used to make the plastic bugs and vermin 


What you had here was a glorified HOT PLATE used to "cure" liquid plastic into a solid flexible plastic. You would plug in your "Thingmaker" (the hot plate) and pour your "Plastigoop" into a mold. Using tongs (remember this thing was HOT) you place the mold with goop onto the Thingmaker. You then wait about two minute, and once again using the tongs, take the very HOT (burning) mold and douse it into a water bath to cool it off. When you placed the hot mold into the cooling tray a big puff of steam would be released as the burning hot mold hit the water. After a certain amount of time the mold would be cool enough to touch and you could pry out your creation. 


Thing-Maker Hotplate, "safety" tongs, cooling tray and molds


It was simultaneously great and dangerous !


Here is one of the original commercials from the 1960's.


Creepy Crawlers set was the original. My favorite was the Mini Dragon Set, because you could assemble from multiple pieces an entire dragon. Below is a list of the various play sets

Creepy Crawlers (1964)
Giant Creepy Crawlers (1965)
Fighting Men (1965)
Creepy People (1965)
Fun Flowers (1966)
Fright Factory (1966)
Mini Dragons (1967)
Picadoos (1967)
Eeeeks ! (1968)
Zoofie Goofies (1968)
Dolly Maker (1969)
Super Cartoon Maker (1969)
Jillions of Jewels (1970)


Advertisement for various Thing-maker playsets.


The Plastigoop came in different colors. It was like printer ink. The more you used, the more you needed. It was a cash-cow for Mattel. Later on Mattel introduced Glow In The Dark goop and I had a few bottles of that.


Plastigoop.  This liquid congealed when heated.  It came in various sizes and colors


Around 1973 or so the product went off the market because some consumer safety group deemed it as dangerous (Imagine that). But all and all it was a great toy and one of my favorites!

Wednesday, December 4, 2013

Toys of Christmas Past - Part 17 - Mother Hen Target Game

Mother Hen Target Game

Various Manufacturers: 1950's - 1970's

Knickerbocker's  version of the toy


This was a indoor target shooting game from the 1950's, 60's through mid 1970's.  

Dart gun, suction darts and plastic eggs


The object was simple, you load the eggs into the back of the game and using a suction cup dart gun, you shoot at a "egg" target on the hen's body.  When you hit the target an egg would pop out of the rear of the chicken and land in a basket.  That is if you hadn't lost or broken the basket.

Directions from one version of the toy.


Throughout the years this toy was passed along from manufacturer to manufacturer.  Makers were Knickerbocker, Eldon, Lakeside and others.  Originally the toy was made mostly of tin, but some of the 1960's versions were also made of plastic.

Tin Version of the toy


Here is a late 1950's or early 1960's toy add shows that this toy cost $2.69, which would be about $21.00 in 2013 dollars.


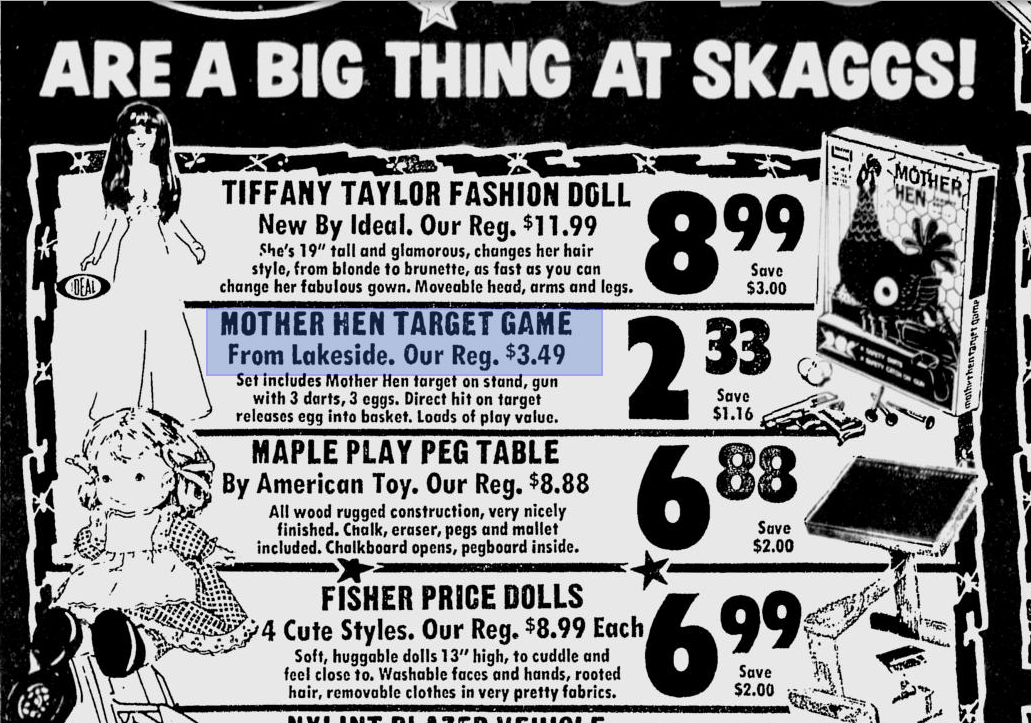
Here is another ad from 1974 (Portland Chronicle).  This time the game is made by Lakeside and is on sale for $2.33 ( $11.58 today ).


A friend of mine (and I can't possibly believe it's true, LOL) claimed that her bothers and sisters would use the dart gun for things other than it's original intended use.  Gasp !  They would line up their mothers Christmas Elves and shoot them off the back of a bench with said dart gun.  Needless to say I'm sure they were just trying to get a little extra practice to get better at the game....   Poor little elves..... :-D


Saturday, November 30, 2013

Toys of Christmas Past - Part 16 - Mr Machine

Mr Machine - Ideal Toys -  1961 -1978


Our entry for today is a toy from IDEAL called Mr Machine.  This was a combination, Erector Set, Model Car Kit, jigsaw puzzle and Robot.  He was a part wind-up robot mechanical man that could actually be taken apart and then (if you were skillful enough) put back together.  He stood about 18" tall and when wound up would roll across the floor swinging it's arms and ever few "steps" would ring a bell and make a mechanical "ah".  You could also see the "inner's" of the robot and watch the gears rotate as the robot moved.

The toy went through several variations.  The original toy was available from 1960 to the early 70's.  A reissue from IDEAL in 1978 was much like the original, except you could not take the toy apart (as safety concerns of the 70's came into play [choking hazard, you know] ).  Another re-issue in 2004 by Poof-Slinky (re:Slinky) featured much of the original toy, and could be taken apart.

Here is the original 1960's patent for the toy.


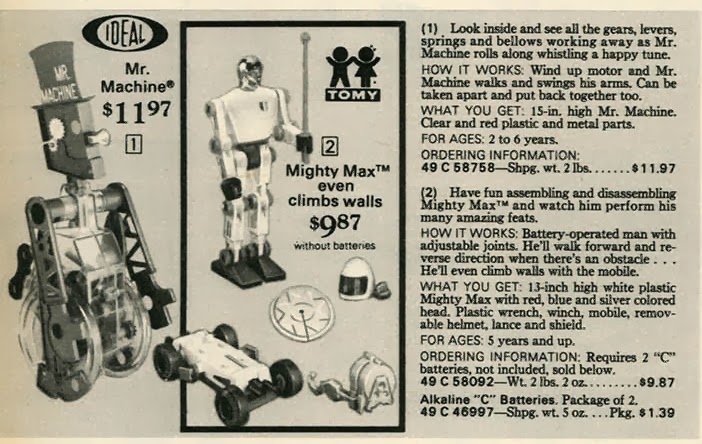
Here is an original add (Circa 1970's) for Mr Machine.

$11.97, what a bargain !
Finally, here is an original 1960's commercial for the toy.


Friday, November 29, 2013

Toys of Christmas Past - Index

Toys of Christmas Past - Index


Below is a handy index of some of the blog post I have created for the "Toys of Christmas Past" series

Those on the list with a LINK and a "Part NN" have been completed.  Others will be done in the future.  Feel free to make suggestions in the comments section !


Toys of Christmas Past - Part 15 - Bing Bang Boing

Bing Bang Boing 

by Ideal - circa 1971-2


This was such a cool nerd toy !

This toy came out in the era of the Ideal ball bearing games.  It's tough to explain, so first take a look at this.

Original Ideal TV add for Bing Bang Boing


Essentially you had a bunch of small drums with a rubber surface stretched over the top and ball bearings. You would launch the ball bearings one by one and they would "bounce" off the drum onto the next drum and so on.

An original Bing Bang Boing on ebay.  Notice that the rubber which stretches over the drums is gone (deteriorated)


It took real skill and patients to set the drums up correctly so that you could have the ball bearing bounce on all 6 or 8 drums and finally into the collection chamber, where they would then be transported back again to the launcher.  While not really saying so, this was essentially a math an science toy, relying on intuition, trial and error and mathematical angles in order to set the drums up properly to have the toy function at all.

Alas, the rubber on the drums would stretch and rip rendering the drum useless. I tried using balloons as a replacement, but this did not work too well. Sets still exist today, but the rubber for the drums have dried up.


Original add for Bing Bang Boing.  At $9.95 it was a "steal"


Could you even imagine a toy like this selling today ! ? !......

Think about it, a toy with ball bearings....
15 seconds after it hit the market it would be recalled. 


It's a wonder any of us are alive to tell about it today....   :-D
We lead such dangerous lives back then !

A great toy for the engineer/mathematician in all of us :^D